 Save
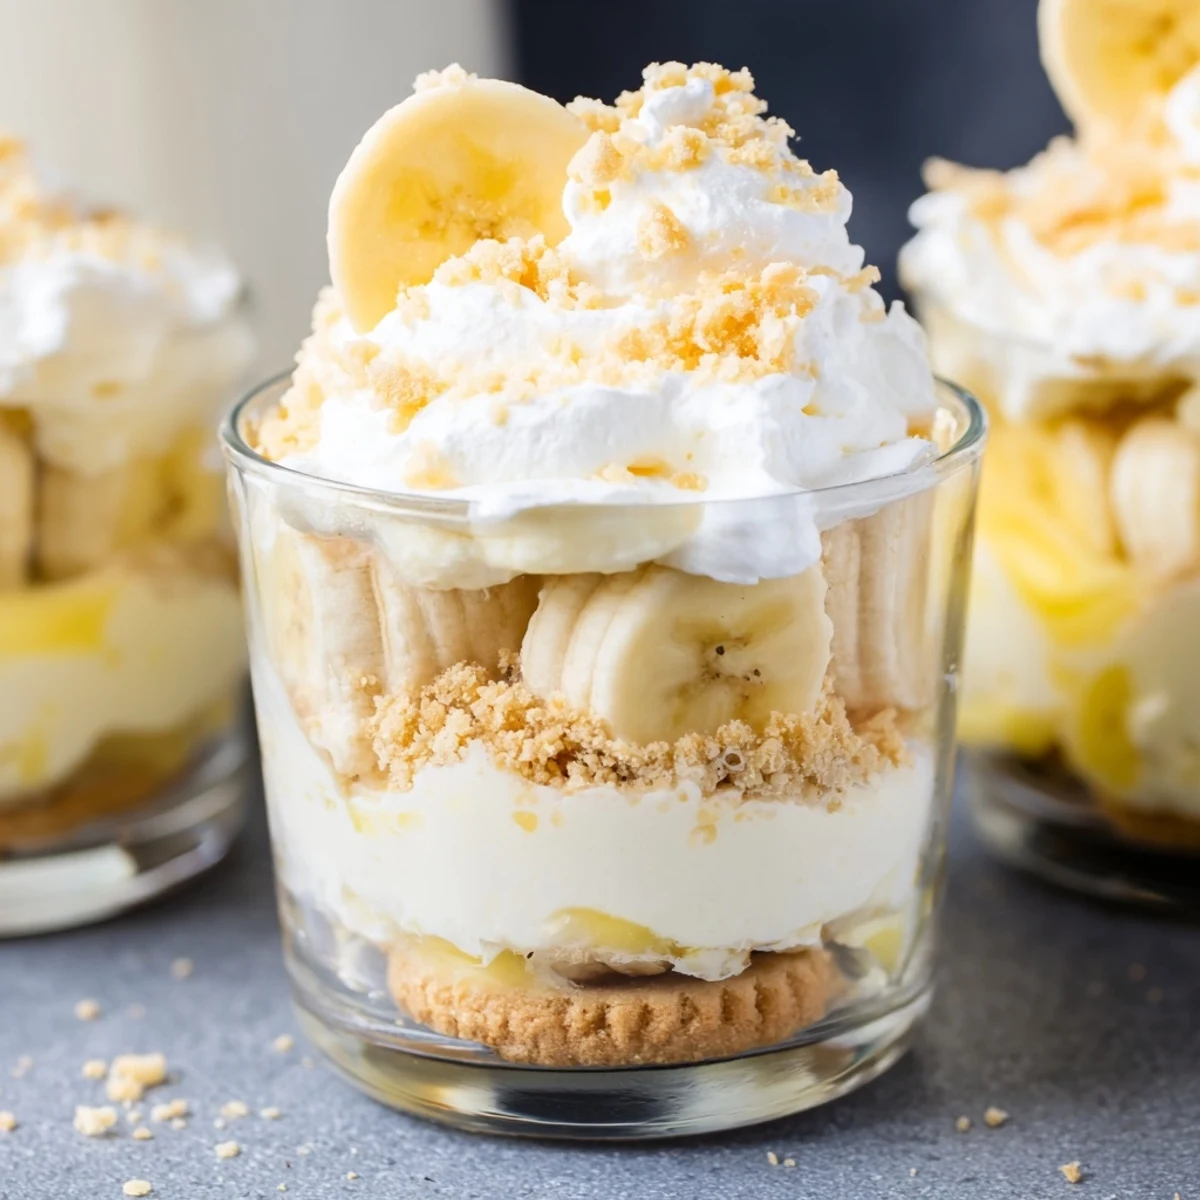
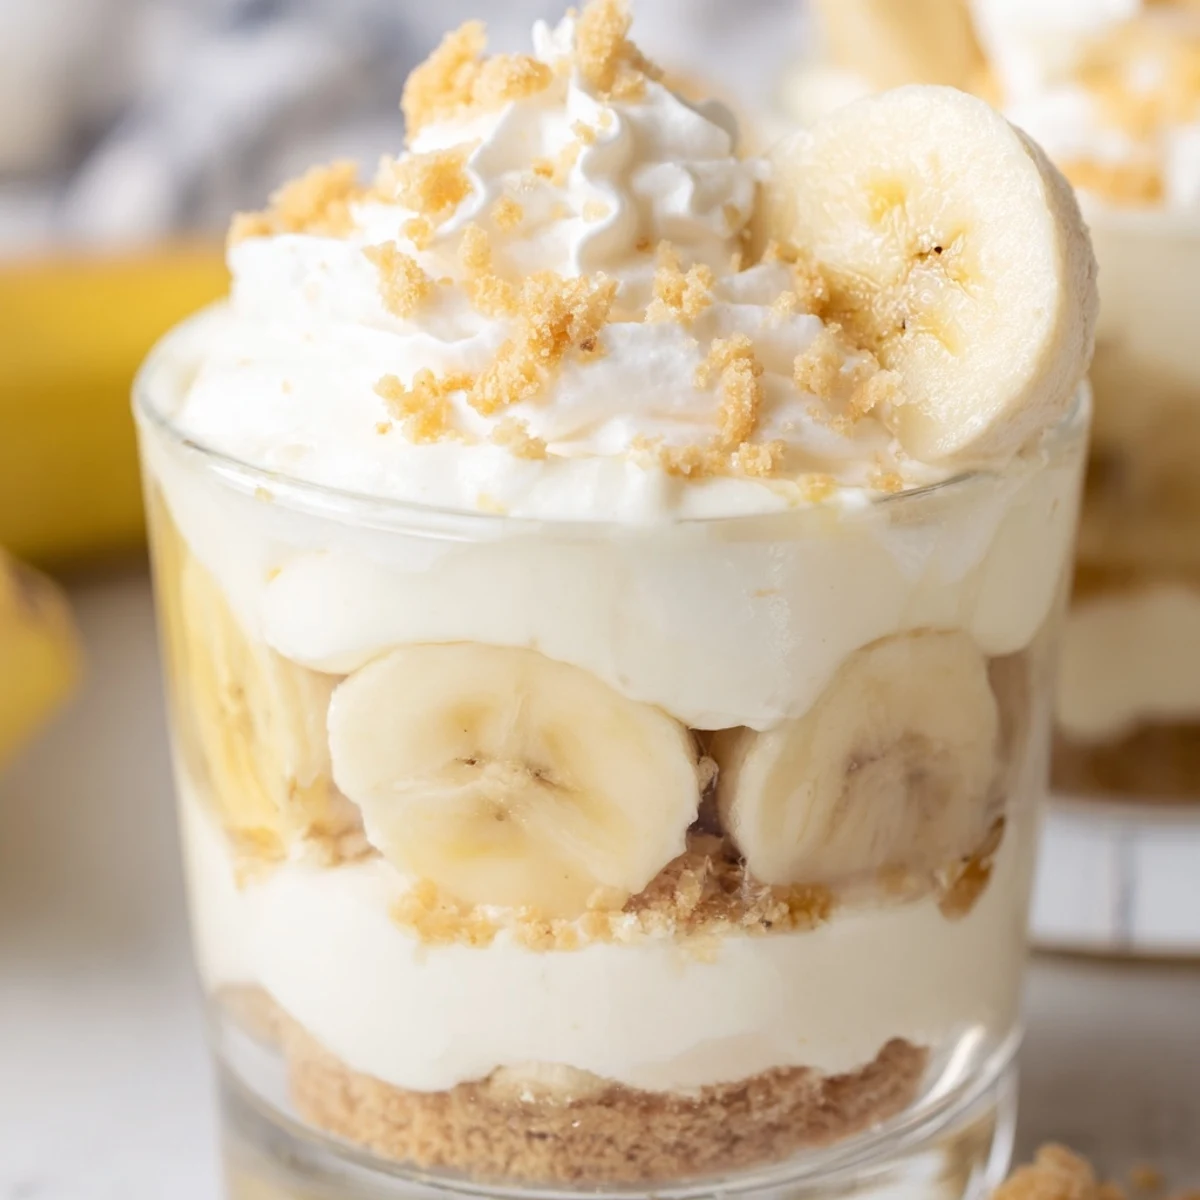
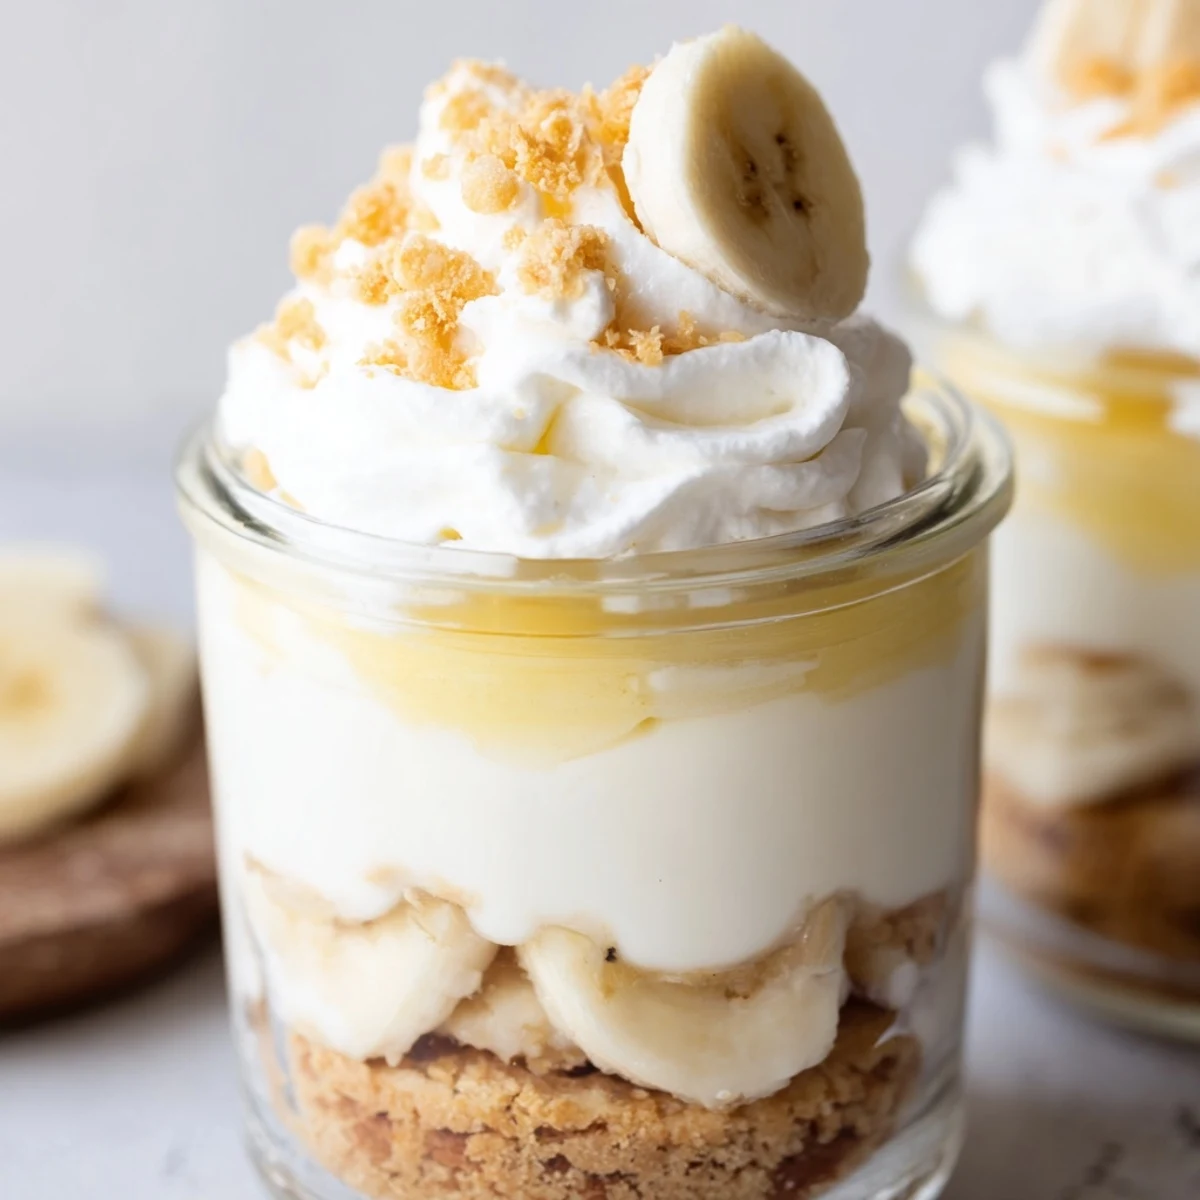
Save These individual no-bake cups combine the best of both worlds—creamy cheesecake filling meets classic banana pudding in layered perfection. Each cup starts with a buttery vanilla wafer crust, followed by velvety cheesecake mixture made with whipped cream and cream cheese. A layer of fresh banana slices adds natural sweetness before the smooth banana pudding layer goes on top. Finished with more cheesecake filling, crunchy wafer crumbs, and fresh banana slices, these cups come together in just 20 minutes of active prep time. After chilling for at least 2 hours, you'll have perfectly portioned desserts that look impressive and taste absolutely divine. The individual servings make them ideal for parties, potlucks, or whenever you want a special treat without heating up the oven.
The kitchen counter was covered in sticky banana pudding bowls, my sister and I taking turns licking spoons after our mom finally let us help assemble dessert. Those individual cups always felt special somehow, like having our own tiny layered cakes that nobody else could touch.
I brought these to a summer potluck last year and watched them disappear in minutes. My friend Sarah actually asked if I would teach her how to make them, which is the highest compliment someone can pay a dessert recipe.
Ingredients
- 1 cup vanilla wafer cookies, crushed: These create that classic banana pudding crunch everyone recognizes from childhood
- 2 tbsp unsalted butter, melted: Just enough to bind the crumbs into a firm base that holds up under all those creamy layers
- 8 oz cream cheese, softened: Room temperature is non negotiable here or you will end up with lumpy filling
- 1/3 cup granulated sugar: Sweetens the cheesecake layer without overpowering the banana flavor
- 1 tsp pure vanilla extract: Use the good stuff since vanilla shines in simple desserts like this
- 1 cup heavy whipping cream, cold: Cold cream whips up faster and holds its structure better when folded into the cheesecake mixture
- 1 package instant banana pudding mix: The shortcut that makes this recipe accessible for weeknight desserts
- 1 1/4 cups cold whole milk: Whole milk creates the richest pudding layer that stands up to the cheesecake
- 2 ripe bananas, sliced: Look for bananas with some brown spots for the sweetest flavor throughout
Instructions
- Build the Crunchy Foundation:
- Toss crushed vanilla wafers with melted butter until every piece is coated and smells like buttery cookies. Press about two tablespoons into the bottom of each cup, using the back of a spoon to create an even layer that will hold everything together.
- Whip Up Cheesecake Perfection:
- Beat softened cream cheese with sugar and vanilla until completely smooth and no lumps remain. In a separate bowl, whip cold heavy cream until stiff peaks form, then gently fold it into the cream cheese mixture until no white streaks show.
- Prepare the Banana Pudding:
- Whisk instant pudding mix with cold milk for exactly two minutes until it thickens into a silky smooth mixture that will hold its shape between the other layers.
- Start the Layering Magic:
- Spoon half the cheesecake mixture over each crust, spreading gently to create an even first layer. Arrange fresh banana slices on top, pressing them slightly into the cheesecake so they do not slide around.
- Add the Pudding and Finish:
- Divide the banana pudding evenly among cups, spreading carefully over the banana layer. Top with remaining cheesecake mixture, then sprinkle with extra wafer crumbs, more banana slices, and a dollop of whipped cream if you are feeling fancy.
- Let the Flavors Meld:
- Cover cups and refrigerate for at least two hours, though overnight is even better. This chilling time lets the crust soften slightly and all the flavors get friendly with each other.
 Save
Save These have become my go to when someone needs cheering up. Something about those individual portions makes people feel special, like you put extra thought into their happiness.
Making These Your Own
The base recipe is fantastic as written, but I have learned that a pinch of cinnamon in the crust adds warmth that plays beautifully against the cool creamy layers. You could also swap vanilla wafers for graham crackers or even Biscoff cookies for a different flavor profile entirely.
Perfecting the Layers
The trick to clean layers is working with slightly chilled mixtures and using the back of a small spoon to gently spread each layer. Rushing this step results in muddy looking cups instead of those Instagram perfect stripes that make people gasp when you serve them.
Timing Is Everything
These actually taste better after sitting overnight in the refrigerator. The crust softens just enough to become easily spoonable while still maintaining that satisfying crunch, and the banana flavor permeates the creamy layers in the most wonderful way.
- Add fresh banana slices right before serving if you are making these more than a few hours ahead
- Keep cups covered tightly to prevent them from absorbing refrigerator odors
- Let them sit at room temperature for ten minutes before serving for the creamiest texture
 Save
Save There is something deeply satisfying about serving individual desserts that look impressive but come together with minimal effort. These cups have saved me countless times when I wanted to bring something special but had zero energy for baking.
Recipe FAQs
- → Can I make these banana pudding cheesecake cups ahead of time?
-
Yes, you can prepare these cups up to 24 hours in advance. Simply assemble them, cover tightly, and refrigerate. For the freshest presentation, add the fresh banana slices and whipped cream topping just before serving to prevent the bananas from browning.
- → What type of cups work best for these individual desserts?
-
Clear glass cups, mason jars, or dessert glasses work beautifully as they show off the attractive layers. You'll need 6 vessels that hold about 6-8 ounces each. Wine glasses or small trifle bowls also make elegant serving options.
- → How do I prevent the bananas from turning brown?
-
To keep banana slices fresh, toss them lightly in lemon juice before adding them to the cups. Alternatively, add the banana slices just before serving. The pudding and cheesecake layers also help protect the bananas from air exposure.
- → Can I use homemade pudding instead of instant mix?
-
Absolutely! If you prefer homemade banana pudding, prepare it using your favorite recipe and let it cool completely before assembling. Just ensure the pudding is thick enough to hold its shape between the cheesecake layers.
- → What's the best way to crush the vanilla wafers for the crust?
-
Place the vanilla wafers in a ziplock bag and crush them with a rolling pin or meat mallet until you achieve fine, even crumbs. Alternatively, pulse them in a food processor for quick, consistent results. The crumbs should resemble wet sand once mixed with melted butter.
- → Can I substitute the vanilla wafers with another cookie?
-
Yes, graham crackers, Nilla wafers, butter cookies, or even digestive biscuits work well as crust alternatives. Each will impart a slightly different flavor profile while still providing that essential crunchy base element.