 Save
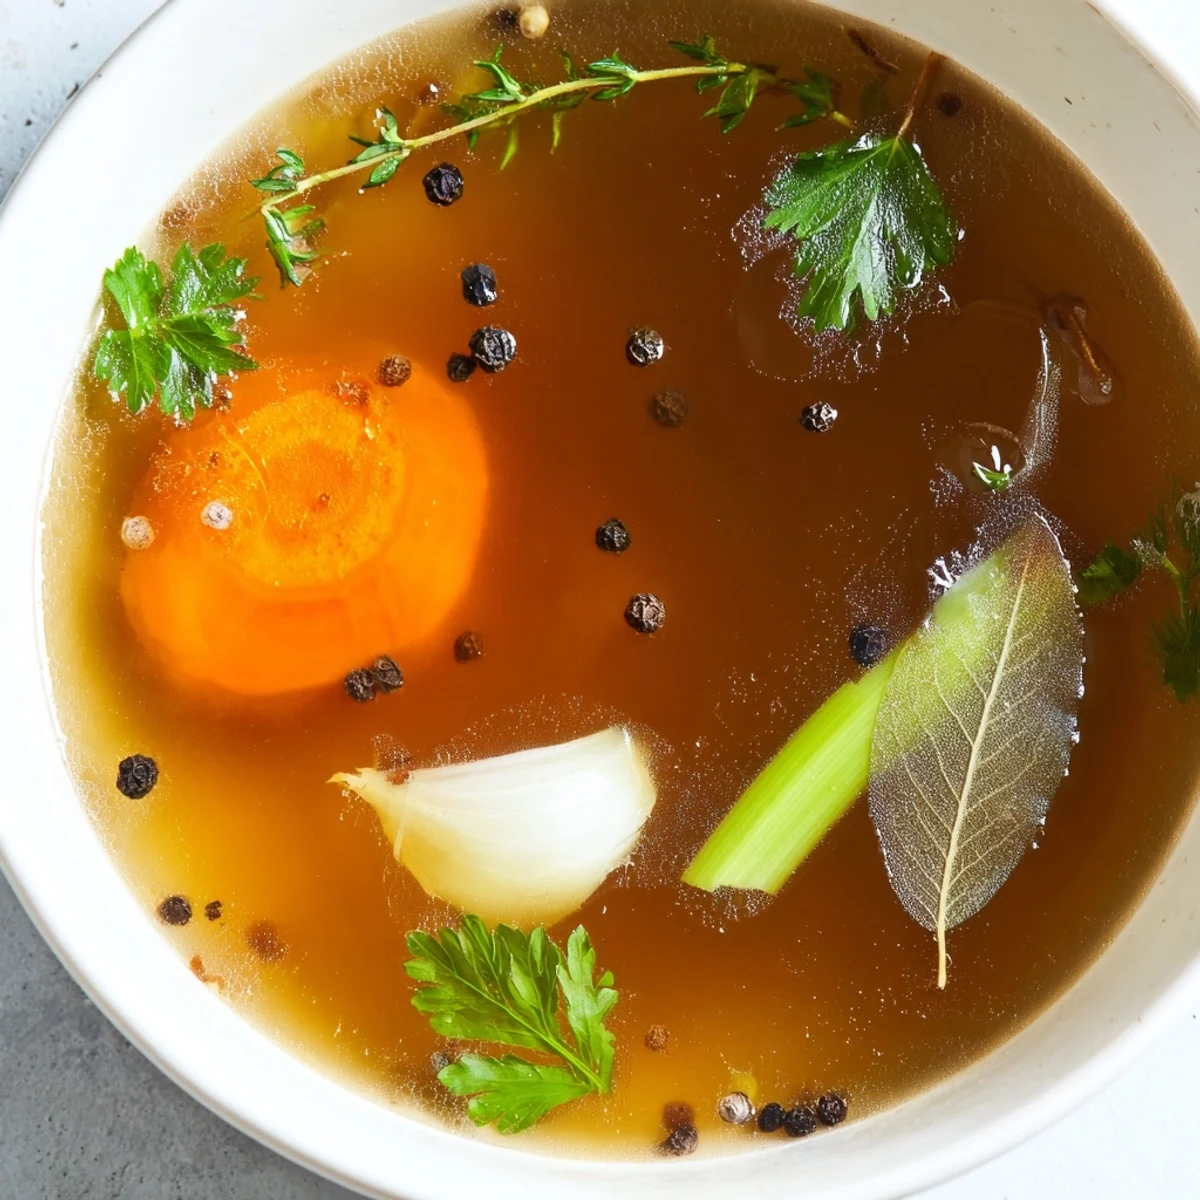
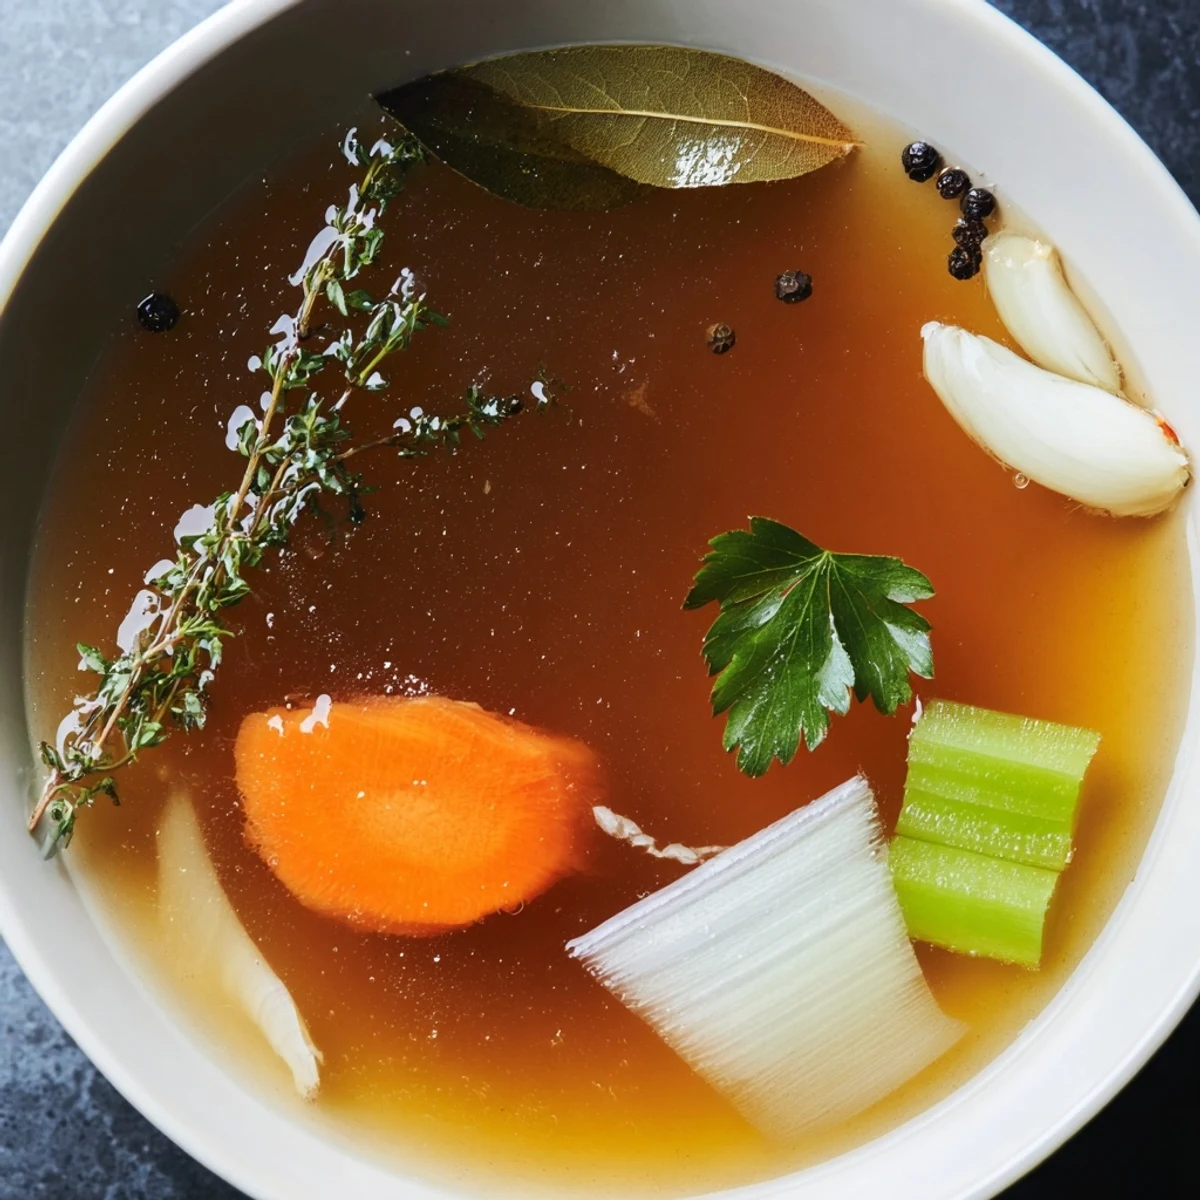
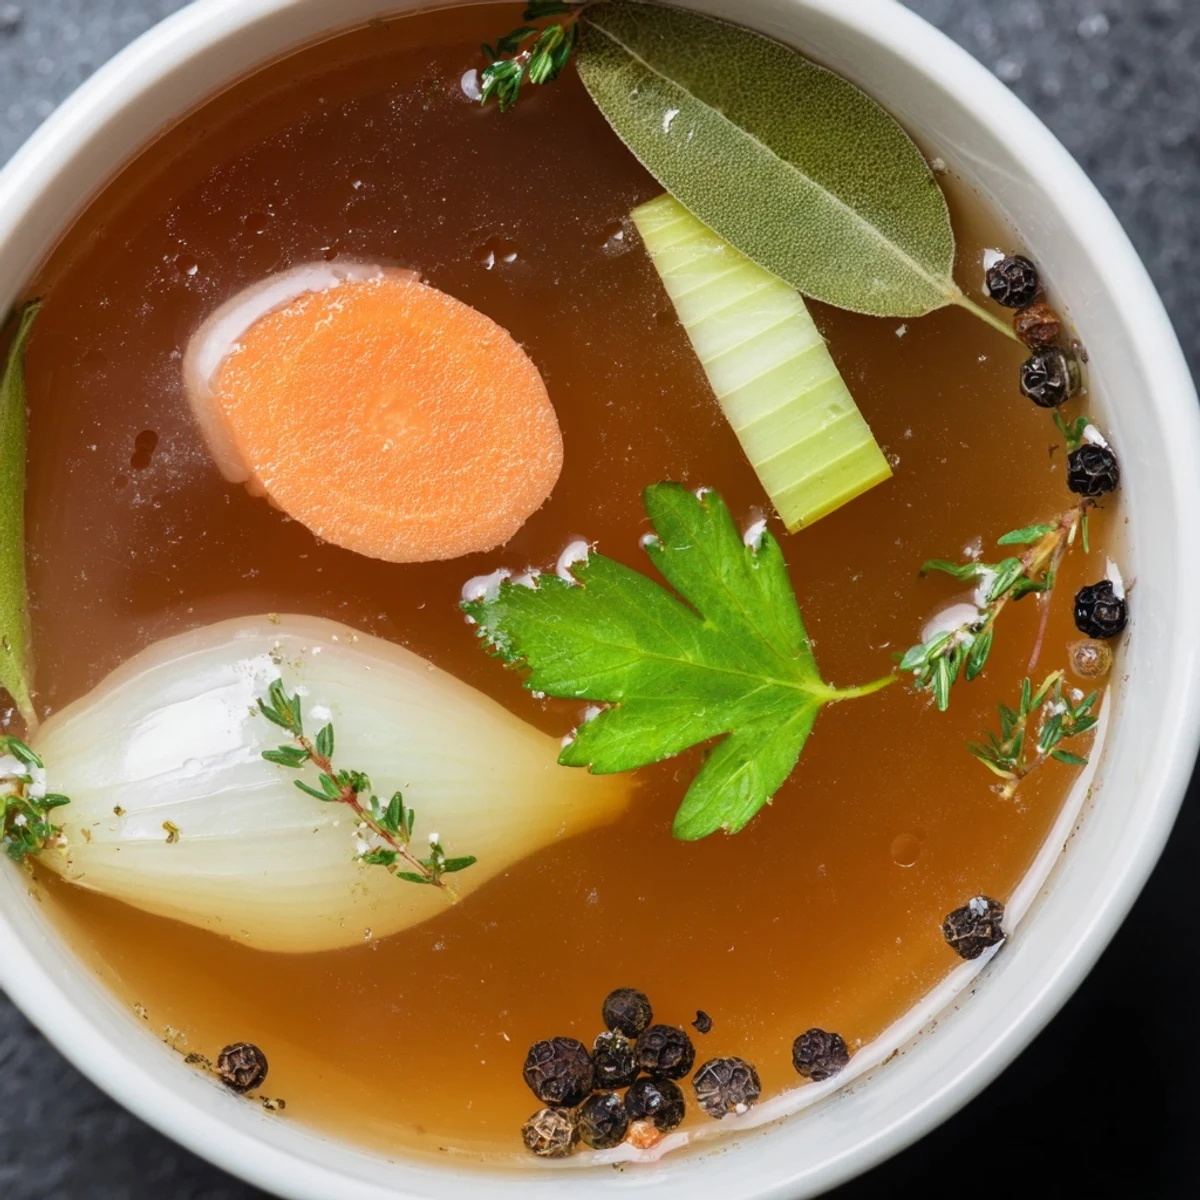
Save Simmer chopped carrots, celery, onions, leeks, and garlic with fresh parsley, thyme, and bay leaves for one hour to create a nutrient-dense base. Strain the mixture to produce a fragrant golden liquid perfect for enhancing soups, cooking grains, or sipping warm for comfort.
There's something quietly magical about a pot of simmering vegetable broth on a slow afternoon. I discovered this the hard way one winter when I ran out of store-bought stock mid-risotto, grabbed whatever vegetables were wilting in my crisper drawer, and ended up with something so aromatic that my kitchen smelled like a cozy bistro. That accident taught me that the best broths aren't about perfection or following a formula—they're about patience and letting vegetables whisper their flavors into the water.
I remember making this broth for my dad when he was recovering from being under the weather, wanting something nourishing but not heavy. As the fragrance filled our kitchen—that unmistakable dance of thyme, bay, and caramelized onion—he wandered in from the other room and just breathed deeply. He said it smelled like someone's grandmother was cooking, and somehow that felt like the highest compliment.
Ingredients
- Carrots: Use the full length—the sweet part near the root carries more flavor than the pale top, so don't just chop and forget about the deeper notes they bring.
- Celery: The whole stalk matters, not just the tender hearts; those stringy outer bits hold mineral-rich flavor that makes broth taste intentional.
- Onion: Leave the papery skin on while quartering—it adds color and won't affect taste, plus it's one less thing to peel.
- Leek: Slice it lengthwise first, rinse between the layers where soil hides, then chop; this vegetable's mild sweetness balances the earthier roots.
- Parsnip or turnip: These add subtle sweetness and body; I use whichever is fresher, though parsnips give a silkier mouthfeel.
- Garlic: Smash the cloves gently with the flat of your knife instead of mincing—you want them to flavor the broth without breaking apart into bits.
- Potato (optional): If you include it, keep the skin on; it adds starch that makes the broth feel more substantial without tasting starchy.
- Fresh parsley: The stems are where the real flavor lives, so don't strip the leaves and toss the rest—bundle it all in.
- Fresh thyme: Tie the sprigs together with kitchen string so you can fish them out easily after simmering; dried thyme will work but tastes more muted.
- Bay leaves: Two is my rule; beyond that, they become aggressive and medicinal-tasting.
- Fresh dill (optional): Add this only if you want the broth to taste faintly licorice-forward; it's lovely but unmistakable.
- Black peppercorns: Whole peppercorns stay mellow in a long simmer, never bitter or sharp like ground pepper would become.
- Sea salt: Start conservative; you can always taste and add more at the end, but oversalting early ruins everything.
- Coriander seeds (optional): Toast these for thirty seconds in a dry pan before adding if you want their warmth to shine through the earthiness.
- Cold water: Start cold so the vegetables release their essence gradually rather than seizing up in heat shock.
Instructions
- Gather and chop everything first:
- Wash your vegetables thoroughly, then chop them into rough, medium-sized pieces—not tiny, because they'll break apart and cloud your broth, but not so large that flavors take forever to extract. I line up all my prepped vegetables in bowls before I even touch the stockpot; it keeps the next steps calm and meditative.
- Build your base in the pot:
- Dump all your vegetables, herbs, peppercorns, coriander seeds if using them, bay leaves, and salt into a large pot. No oil, no preliminary sautéing—just layer everything and cover it with cold water. Cold water lets the vegetables release flavors gradually, like they're giving up their secrets slowly.
- Bring to a gentle boil:
- Turn the heat to medium-high and let the water warm up. Once steam rises steadily and you see bubbles breaking the surface, you're at a boil. This usually takes about 10 minutes, and you'll notice a foamy layer starting to form—that's proteins and minerals releasing, which we'll address next.
- Skim and simmer low:
- Turn the heat down to low so the surface is barely trembling, not aggressively bubbling. Using a spoon or skimmer, gently push that foam toward the edge of the pot and scoop it away—do this two or three times in the first 10 minutes. It only takes a moment, but it keeps your final broth crystal-clear instead of cloudy.
- Let time do the work:
- Now you're in the waiting game: one hour of low simmering while you read, organize a drawer, or just listen to the quiet sounds of a pot doing its thing. The aroma will be your only real work here—every 15 minutes or so, take a breath and notice how it evolves and deepens. Occasionally you'll see small foam again; a quick skim keeps things clean.
- Strain with care:
- When the hour is up, your broth will have turned golden and smell like pure comfort. Set a fine mesh sieve over a large bowl or pot, then carefully pour the broth through, letting gravity do the work. The vegetables have given everything they have, so discard them without guilt.
- Taste and adjust:
- Once it cools just enough to sip safely, taste it. Does it need more salt? A little more pepper? Trust your mouth—this is the moment to make it exactly what you want. Sometimes I add a pinch of fresh dill or thyme at this point if the broth feels like it's missing brightness.
- Store for later or use immediately:
- Use your broth right away while it's warm and aromatic, or let it cool completely before refrigerating in airtight containers for up to five days. It freezes beautifully in ice-cube trays, so you can thaw just what you need for a single soup or risotto.
 Save
Save What surprised me most about making homemade broth was how it changed the way I cook everything else. Once you've sipped a broth you made yourself, realizing it cost almost nothing and took just your time, every soup and grain afterward tastes like a small act of care rather than just another meal.
The Roasting Option for Deeper Flavor
If you have an extra 30 minutes and want your broth to taste darker and more complex, roast your chopped vegetables at 400°F until the edges turn golden brown and caramelized. This isn't mandatory—the basic version is already rich—but it's the secret when you want something that tastes like it's been simmering for four hours instead of one. The roasting develops deeper, almost nutty notes that make the broth more of a destination than a background player.
Umami Additions and Variations
The base recipe is perfectly balanced on its own, but I often toss in a small piece of dried kombu (seaweed) or a few dried mushrooms for extra depth. These add umami—that savory, mouth-filling quality—without announcing themselves loudly; the broth just tastes more intentional and restaurant-quality. If you go this route, add them with the vegetables at the start so their flavor has the full hour to develop.
Beyond the Pot
This broth becomes the foundation for everything from silky risotto to simple vegetable soup, but don't sleep on sipping it plain and hot in a mug on a quiet morning. I've also used it to cook grains—rice, barley, farro—which somehow transforms them into something more eloquent than water ever could.
- Freeze it in ice-cube trays so you always have a tablespoon of brightness ready for sauces or last-minute additions.
- If you save vegetable scraps during the week (clean carrot tops, celery ends, onion peels), toss them into a freezer bag and use them next time instead of chopping fresh vegetables, making this recipe nearly free.
- A warm mug of broth with a pinch of sea salt is medicine disguised as simplicity.
 Save
Save Homemade broth is one of those quiet kitchen skills that costs almost nothing but returns everything: flavor, nourishment, and the small satisfaction of turning simple vegetables into something that makes every other dish taste better. Once you make it once, you'll find yourself making it again and again.
Recipe FAQs
- → How should I store this broth?
-
Cool completely and refrigerate in an airtight container for up to 5 days, or freeze for up to 3 months.
- → Can I use frozen vegetables?
-
Fresh vegetables yield the best flavor, but frozen scraps can be used if necessary, though the texture may be softer.
- → How can I make the flavor richer?
-
Roast the vegetables at 400°F (200°C) for 30 minutes before simmering to caramelize the natural sugars and add depth.
- → Is this suitable for a vegan diet?
-
Yes, this preparation uses only vegetables, herbs, and water, making it completely vegan and gluten-free.
- → Can I reduce the cooking time?
-
While you can simmer for 30 minutes, a full hour is recommended to fully extract the nutrients and flavors from the ingredients.