 Save
Save Craft your own rich and creamy Greek yogurt using just whole milk and a starter culture. This straightforward method involves heating milk to the perfect temperature, culturing for several hours, then straining to achieve that signature thick texture. The result is a tangy, protein-packed yogurt ideal for breakfast bowls, smoothies, or as a versatile cooking ingredient.
There's something magical about watching milk transform into thick, creamy yogurt right on your kitchen counter. My first attempt was born from sheer curiosity and a container of store-bought yogurt that was about to expire. The kitchen smelled warm and slightly sweet during the culturing hours, like bread dough rising but subtler.
Last summer, my niece watched the entire process with wide eyes, checking the thermometer every twenty minutes like a tiny scientist. When she tasted the first spoonful of strained yogurt with honey, she declared it better than ice cream. Now she asks for 'the yogurt we made' every time she visits.
Ingredients
- Whole milk: The higher fat content creates that luxurious mouthfeel you expect from Greek yogurt. I've tried low-fat versions but they never achieve the same silky richness.
- Plain yogurt with live cultures: This is your starter, the microbial magic that transforms milk. Look for brands that specifically say 'live active cultures' on the container.
Instructions
- Heat the milk gently:
- Warm your milk to 82°C (180°F), stirring occasionally so it doesn't scorch. The kitchen will fill with a comforting, milky steam that somehow feels nostalgic.
- Let it cool to the perfect temperature:
- Wait until the milk drops to 43°C (110°F), about body temperature. This is crucial since too hot will kill your cultures, but too cool won't activate them.
- Temper your starter:
- Whisk a few spoonfuls of cooled milk into your yogurt starter until smooth. This gentle introduction helps the cultures adjust without shock.
- Combine everything:
- Pour the starter mixture back into your main pot of milk, stirring gently but thoroughly. Pour into clean jars and wrap them in a thick towel to maintain warmth.
- Wait for the transformation:
- Let your yogurt culture undisturbed for 6-8 hours in a warm spot. The anticipation is the hardest part, but resist the urge to check it constantly.
- Strain for Greek thickness:
- Line a strainer with cheesecloth and set it over a bowl. Pour in your yogurt and refrigerate for 1-2 hours until it reaches your desired consistency.
- Store your creation:
- Transfer the thickened yogurt to a clean container and refrigerate. It will keep for about two weeks, though it rarely lasts that long in my house.
 Save
Save This yogurt has become my go-to gift for housewarmings and dinner parties. People light up when they learn you made it yourself, like you've shared a small piece of domestic magic. My neighbor now makes a batch every Sunday afternoon.
Customizing Your Yogurt
Goat or sheep milk creates wonderfully tangy variations that taste completely different from cow's milk versions. I once experimented with raw milk from a local farm and the depth of flavor was incredible. Each milk type brings its own personality to the final product.
Serving Suggestions
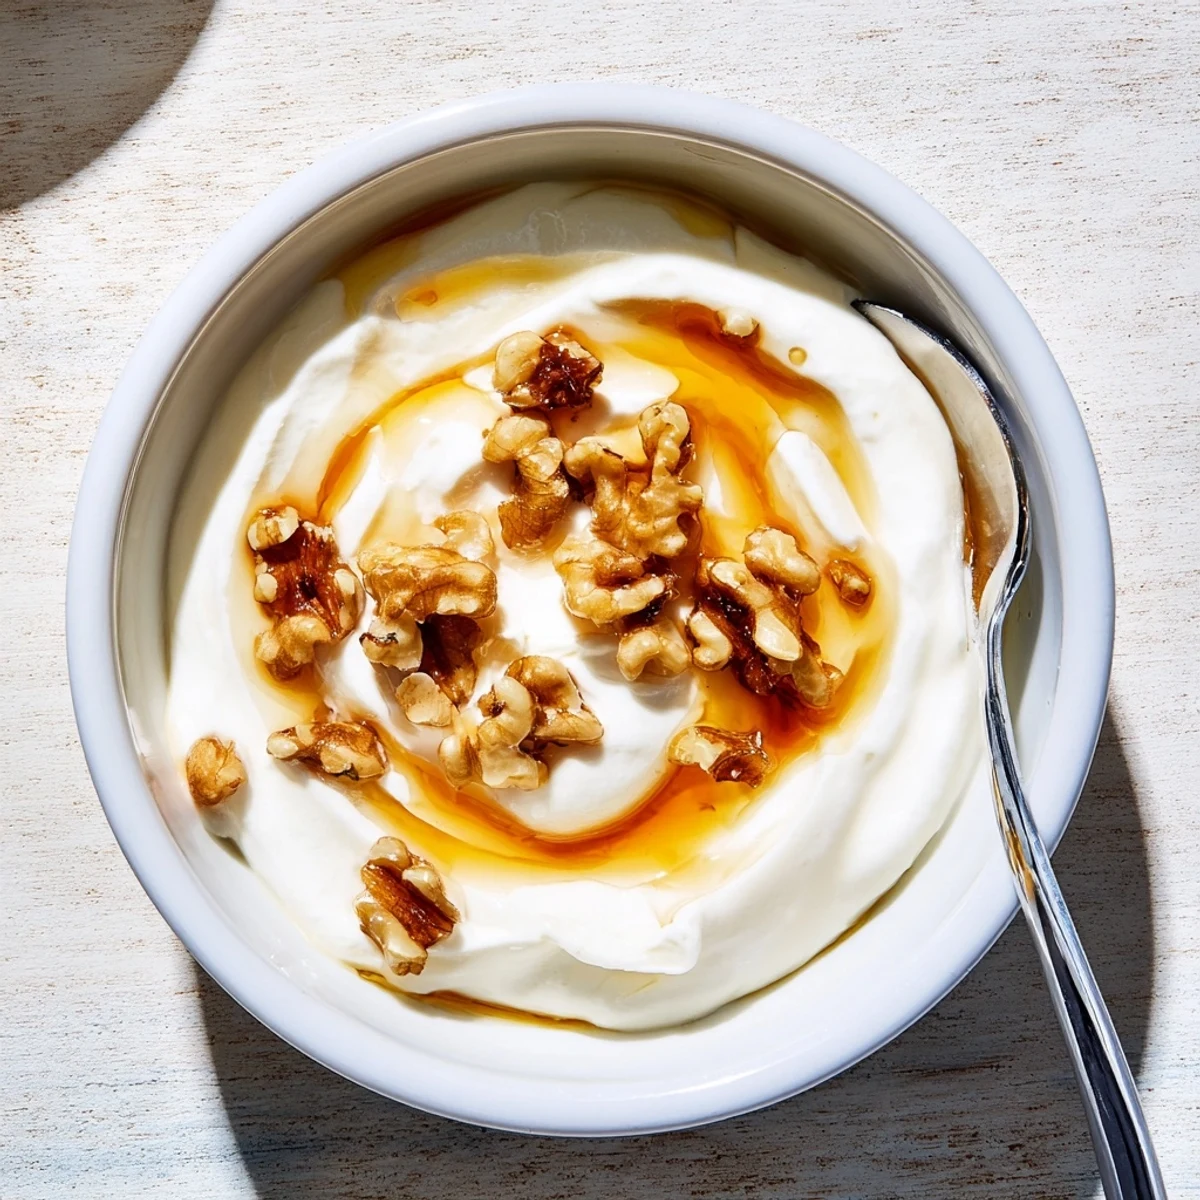
A drizzle of honey and handful of toasted walnuts transforms plain yogurt into dessert. In summer, I mash fresh berries right into the bowl, their juices creating beautiful streaks throughout the creamy white yogurt. My grandmother used to spoon it over roasted eggplant with olive oil and za'atar.
Storage And Troubleshooting
Always save a few spoonfuls from each batch to start your next one. I've kept my starter going for six months now, like a living pet in the fridge. If your yogurt turns out too thin, simply strain it longer or try leaving it to culture for an additional hour next time.
- Keep your culturing container away from drafts and sudden temperature changes
- Use glass containers rather than plastic for the best flavor development
- The first batch from store-bought starter is usually the thickest, subsequent batches may vary slightly
 Save
Save There's something deeply satisfying about creating something so essential from scratch. Once you taste homemade Greek yogurt, store-bought versions somehow seem lacking. Welcome to a lifetime of better breakfasts.
Recipe FAQs
- → What makes Greek yogurt different from regular yogurt?
-
Greek yogurt undergoes straining to remove whey, resulting in a thicker, creamier texture with higher protein content compared to regular yogurt.
- → How long does homemade Greek yogurt last?
-
When stored properly in an airtight container, homemade Greek yogurt stays fresh in the refrigerator for up to two weeks.
- → Can I use this method with non-dairy milk?
-
Yes, you can substitute goat or sheep milk. For non-dairy alternatives, ensure you use a compatible starter culture designed for plant-based milks.
- → Why is a thermometer important?
-
Precise temperature control ensures the milk reaches 82°C to pasteurize, then cools to 43°C for optimal culture activation without killing beneficial bacteria.
- → What can I do with the whey liquid?
-
The strained whey contains protein and nutrients, making it excellent for adding to smoothies, using in baking, or even as a starter for fermentation projects.
- → How do I make the yogurt thicker?
-
Extend the straining time in the refrigerator. The longer you drain, the thicker and more concentrated the yogurt becomes.